I usually make a big batch of these chicken bites, so I always have a great supply of tasty protein for my salads and Buddha bowls. I just add some sliced red onions, cucumbers, and tomatoes seasoned with a little salt and lime juice. Then, I top it all off with my mint chutney for a fresh and flavorful meal. If you’re tired of eating chicken the same way every day, my easy chicken tikka will bring new life to your boring bird. If you’re craving Indian food but don’t have access to an Indian restaurant, these tikka are much easier to make than curries, and just as satisfying! Very soon, you won’t need a reason to make them – they’ll become your favorite way to enjoy chicken, just like they are mine. Seriously, Chicken Tikkas are one of the most cooked Indian dishes at the Beisers’. Mostly because they’re less complicated than the rest of the plethora of Indian dishes. Let’s face it, most of them need a lot of time in kitchen. But this one is pretty straightforward! I just marinate the meat and cook it! The key to these flavor bombs is the marinade. Once I perfected that, it’s no sweat! You know one more great thing about these tikkas? They are the same chicken pieces that goes in your favorite chicken tikka masala, one of the most loved entrées in Indian restaurants. Stay tuned and subscribe to GypsyPlate, I will be teaching you that one very soon…
What are Chicken Tikkas?
Commonly known as Tandoori chicken tikkas in restaurants, they are traditionally cooked in a clay oven called a tandoor. Most Indian restaurants cook many different types of kebabs and naan breads in these bell shaped clay ovens. Most of us don’t have the liberty to have tandoors in our kitchen, but you can still replicate the flavors in your oven or on your grill. Well… sometimes we even pan roast it. I love my tikkas whichever way you cook them. When I see them on a piece of naan bread or over a plate full of salad with splash of my green mint chutney… Ahmmm, there is one happy woman!! I grew up on different types of kebabs, hundreds of varieties of them. And no, I am not exaggerating. Going to a restaurant and not ordering 2-3 different types of kebabs before your main course is unheard of. Sometimes the appetizers takes over and we end up sharing the mains. Looking back I think, chicken tikkas are by far the most loved and adored, and are treated like the kings of kebabs.
Ingredients Needed
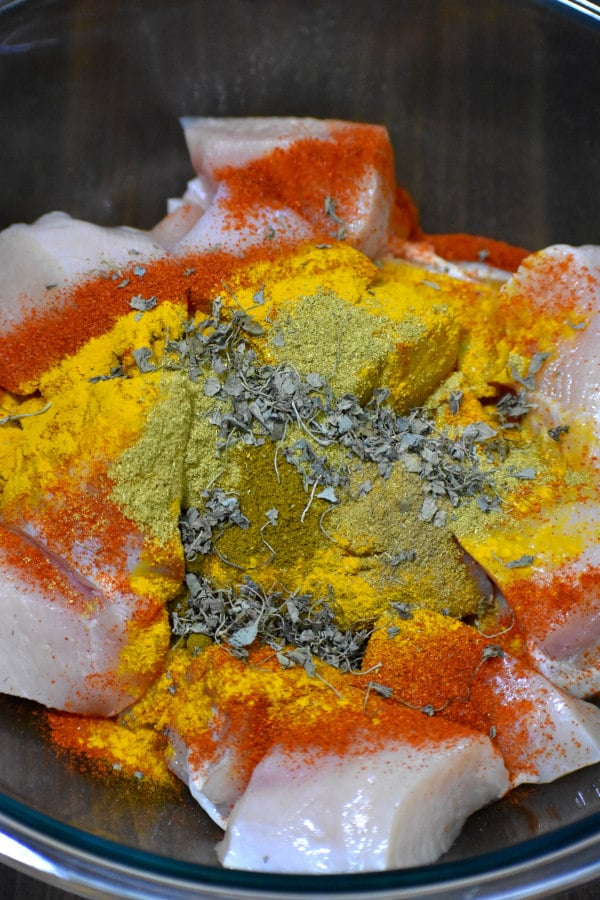
Boneless chicken breast – I cut it into bite size pieces. Sometimes I make the same recipe with boneless skinless chicken thighs and they are equally great in this recipe. Butter or ghee – for basting. Yogurt – This is the base for the marination and naturally tenderizes the meat. I prefer using thicker yogurt like Greek. Garlic paste – very important. Ginger paste – second important 🙂 Red chili powder – I use Kashmiri red chili powder, which gives great color but is milder than regular chili powder. You can use paprika in the absence of Indian red chili powder Turmeric powder – see why Indian food is so great for you? All those healing spices. Cumin powder – another Indian staple. Coriander powder – all these spices are going to add so much pizzazz in your life. Garam masala powder – You just need a hint of this, so as not to overpower the other flavors Lemon juice – freshly squeezed. Cilantro – chopped. Mint – chopped, fresh herbs give amazing flavors. Salt and pepper Vegetable oil or olive oil Kasturi methi (optional)- This is dried fenugreek leaves, which you generally only get in Indian stores. Don’t worry if you skip it, but I love it for it’s unmistakable flavor.
Don’t get intimidated by this long list of, ingredients. Just grab whatever you find in your pantry from the above list add it to your yogurt marination. The idea is to just get doing it, and you will see that even missing a few ingredients it turns out pretty mouth watering.
Marination
The most important thing for mouth watering, juicy, tender chicken tikka is the perfect marination. During marination, the chicken absorbs the flavors from different spices and herbs and is naturally tenderized. For this reason, I marinate my chicken at least 5-6 hours. If you can’t marinate overnight, I suggest starting first thing in the morning. It’s a very easy yogurt based marinade, with mostly pantry staples. If you are missing a few of the ingredients, go ahead and make it anyway, it’s going to turn awesome. My preferred method is to add all of the herbs and spices to the chicken and mixing well before adding the yogurt. This way the flavors seep nicely into the chicken before getting cut by the creaminess of the yogurt. If you are less experienced with Indian spices and wish to have more control over your spice level, add all of the above ingredients, except chicken, in a bowl and mix well. You can start with smaller quantities of the spices and taste your marinade. Then slowly add more spices until the flavor is to your liking. Next, add your chicken pieces into the marinade. Cover with plastic wrap, stick it in the fridge and leave it to marinate. For best results, leave overnight, but 5-6 hours will still give great results. In a pinch, at least an hour, though this is not optimal.
Chicken Tikka Recipe
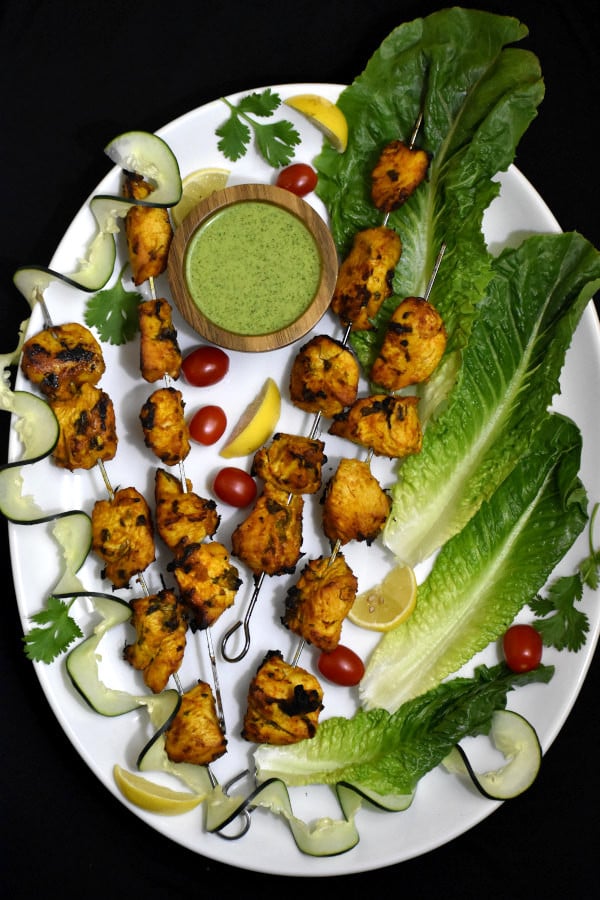
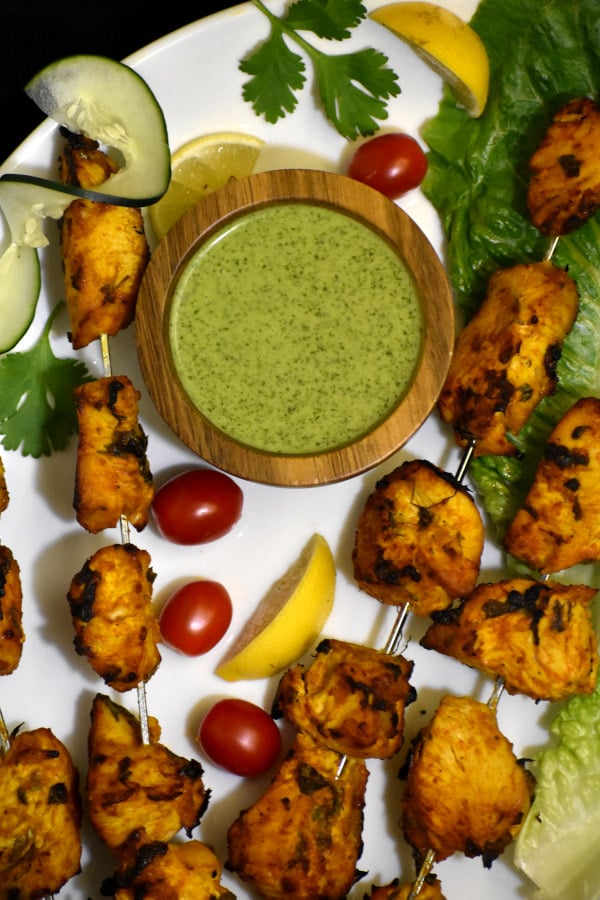
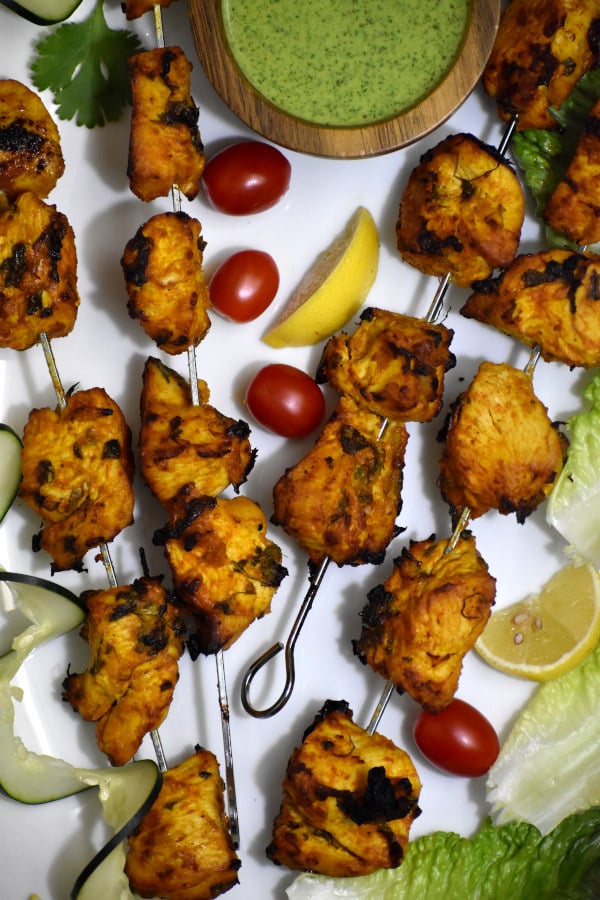
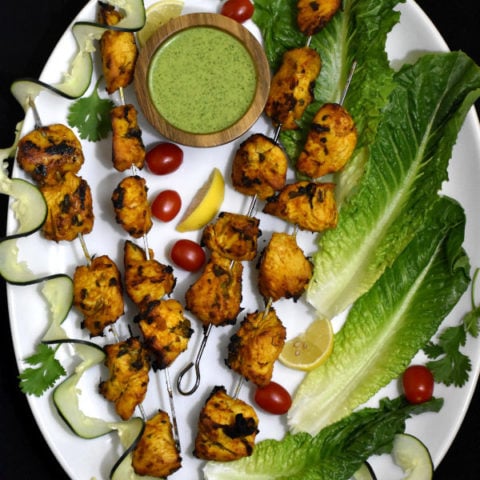
Once you are ready to cook, you have a few options. You can roast your tikkas in the oven, grill them on your barbie, or even pan cook them on the stove… For the oven: I start by preheating the oven to 500°F (yes, that hot). I line a baking dish or pan with aluminum foil and grease it with oil. Then, I arrange the chicken pieces on skewers and place the skewers on the pan. I baste the tikkas with melted butter, cover them with foil, and bake for 15 minutes. After 15 minutes, I remove the foil, baste with melted butter all over again, and turn over the skewers. I bake uncovered for another 15 minutes. Finally, I broil them for 3-4 minutes, keeping a close eye on my tikka. I want a few char marks, but not burnt. For the grill: I preheat the grill on medium-high. After shaking off the excess marinade, I thread the chicken pieces onto the skewers. I place the skewers on the pre-heated grill and cook them covered, turning the skewers every 5 minutes and basting with melted butter or ghee. I continue cooking until the chicken juices run clear and the tikkas have developed some char marks, which takes about 15-20 minutes total. For stovetop: I heat 2 tablespoons of butter and 1 tablespoon of cooking oil in a pan over high heat. Then, I place a single layer of chicken pieces, making sure they’re not too close together, and sear them on both sides. I might need to add additional butter when flipping the tikkas the first time, so both sides get a nice butter coating. After searing, I reduce the heat to medium and cook until the chicken is cooked through, which takes about 10-12 more minutes for bite-sized pieces, flipping occasionally. Whatever your cooking method, garnish your tikkas with a nice spritz of lemon juice and chopped cilantro or mint and serve over butter naan or salad. To take this meal to the next level, serve with my Cilantro Mint Chutney. These chicken tikkas refrigerate great, so make big batches. Now your lunches are set for the next few days, if any tikkas are spared the first time around! Just heat them up in the microwave and serve. Make these chicken tikkas your regular affair, and think of me whenever you create this Indian classic in your home!
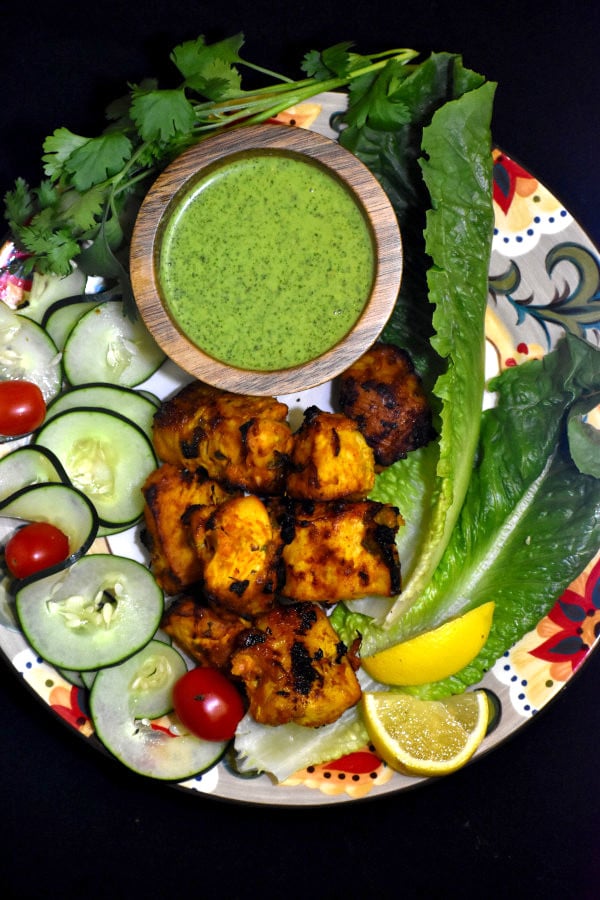
Chicken Tikkas, on our Gypsy Plate… Enjoy!!!
Try my other Indian Specialties!Chicken Masala CurryTomato Cucumber RaitaCauliflower Peas MasalaShrimp KormaPork VindalooPalak PaneerDal Tadka